Don’t just take pictures—create lasting wildlife art. A South African safari is a once-in-a-lifetime opportunity. Yet, the difference between a simple snapshot and a portfolio-worthy image often comes down to advanced planning and technique. Over 80% of wildlife shots are missed due to a lack of preparation or slow reaction time.
This guide moves past the fundamentals to give you the extensive, professional advice needed to bring home truly stunning images of the Big Five and the breathtaking landscapes of the Lowveld.
Gear Strategy: Optimising Your Kit for the Bush
Forget the “less is more” advice for this one; for a South African safari, prepared versatility is key.
The Right Lenses: Reach and Speed
Primary Telephoto:
Focal Length: 400mm to 600mm (or equivalent).
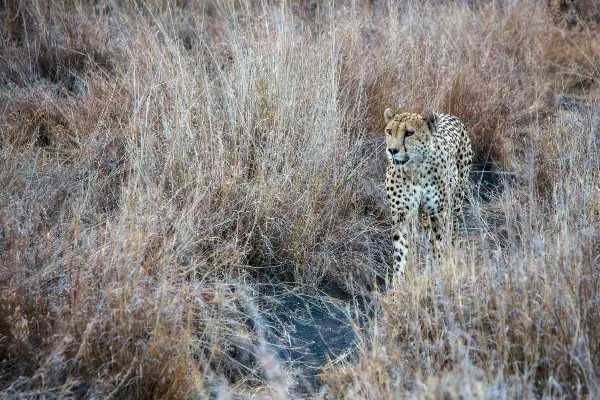
Key Purpose: Critical for filling the frame with distant predators (like a leopard in a tree) or capturing intimate portraits without disturbing the animal.
Pro-Tip: A fast maximum aperture ($f/4$ or $f/5.6$) is crucial for low light, which is when the best action happens (dawn/dusk).
Mid-Range Zoom:
Focal Length: 70-200mm (or 100-400mm).
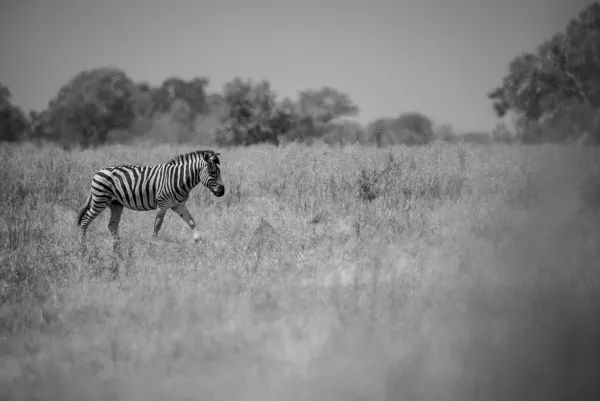
Key Purpose: Excellent for larger animals closer to the vehicle (elephants, buffalo) and capturing “wildlife-in-landscape” shots, providing crucial context.
Pro-Tip: Ideal when game drives allow closer proximity, such as in private reserves. Avoid lens changes!
Wide-Angle:
Focal Length: 14-35mm or 24-70mm.
Key Purpose: Essential for stunning sunrises, sunsets, the vast Highveld landscapes, and capturing a sense of scale with an animal very close to the vehicle.
Pro-Tip: Use for creative shots like a low-angle silhouette of a giraffe against the sky or a dramatic landscape with a tiny vehicle.
The Non-Negotiable Accessories
Camera Support: A beanbag is infinitely more useful than a tripod on an open safari vehicle. It rests on the vehicle’s rail and absorbs vibration. Bring it empty and fill it with dried beans or rice at your lodge to save luggage weight.
The Second Body: If you can manage it, a second camera body with a different lens (e.g., your 400mm on one, your 70-200mm on the other) eliminates the risk of dust on your sensor and ensures you never miss a shot fumbling a lens change.
Dust Protection: South African reserves, especially during the dry season, are incredibly dusty. Bring a few old pillowcases or fabric lens wraps to cover your gear immediately when not in use. Do not change lenses outside of the lodge.
Mastering Camera Settings: Anticipating Action
Wildlife moves fast, especially the coveted cheetah or a bird in flight. You must be prepared to adjust faster than your camera’s auto-mode.
Shutter Speed Priority (Tv or S Mode) is Your Default
On a shaky vehicle, your first enemy is motion blur—both yours and the animal’s. Use Shutter Speed Priority for ultimate control.
Moving Wildlife (Run/Fly): $\geq 1/1600 \text{ sec}$
Walking/Grazing Animals (Lion, Elephant): $\geq 1/640 \text{ sec}$
Stationary Portraits (Headshots): $\geq 1/400 \text{ sec}$ (To counter camera shake from long lenses)
The Exposure Triangle in the Bush
Aperture (f-stop):
Professional Strategy: Shoot Wide Open: $f/4$ to $f/5.6$ to achieve a beautiful, blurry background (bokeh) that isolates your subject.
Pro-Tip: Exception: Stop down to $f/8$ or $f/11$ only for “animal-in-landscape” shots where you need both the foreground and background in focus. This is essential for low-light golden hour shots where you need every bit of light.
ISO:
Professional Strategy: Use Auto ISO with a strict maximum limit (e.g., ISO 3200 or 6400, depending on your camera model). The camera will adjust the ISO to maintain your chosen fast shutter speed.
Pro-Tip: The difference between shooting at 6 AM and 7 AM is immense. Auto ISO manages this light shift quickly and efficiently.
Focus:
Professional Strategy: Set to Continuous Focus (AF-C / AI-Servo) and use a single-point or small-zone focusing cluster. Focus on the animal’s eye—if the eye is not sharp, the photo is a miss.
Pro-Tip: South African guiding often involves tracking an animal through thick brush. Your continuous focus mode must keep the eye locked as the vehicle moves.
Ethical and Practical Bush Etiquette
Your behavior dictates both the quality of your images and the well-being of the wildlife.
Trust Your Guide’s Positioning: Your guide or tracker will know the sun’s angle and the animal’s likely path. They position the vehicle for safety first and photography second. Never complain about the vehicle’s position; instead, adapt your shooting angle.
The ‘Flash’ Rule: Never use flash at night on wildlife. It can disorient or frighten nocturnal animals. If you must shoot at night, use your largest aperture and highest acceptable ISO to capture the scene, or try a creative long-exposure technique with your guide’s filtered spotlight (ask your guide first).
Silent Mode is Mandatory: The constant clack-clack-clack of a high-speed shutter can stress animals and ruin the experience for others. Use your camera’s silent or electronic shutter mode (if available) or the “Quiet” shutter setting.
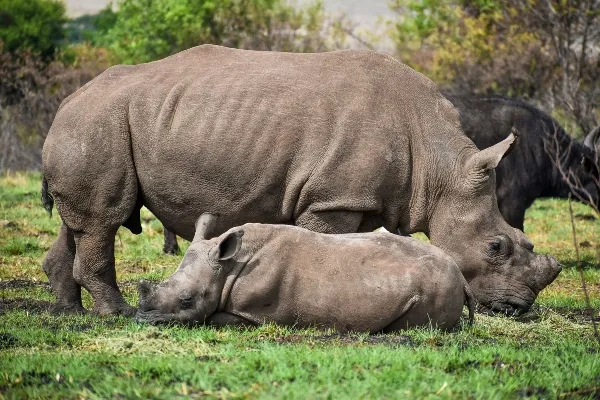
Patience for Behaviour: The professional shot is rarely the first one you take. Be patient. Wait for the animal to yawn, stretch, interact with its young, or look directly at the camera. Watch its body language, pre-focus, and be ready for the moment of decisive action.
By treating your safari as a dedicated photographic mission – with the right gear, expert settings, and respectful patience – you will capture the true, wild essence of South Africa.

Advanced Composition & Light: The Golden Formula
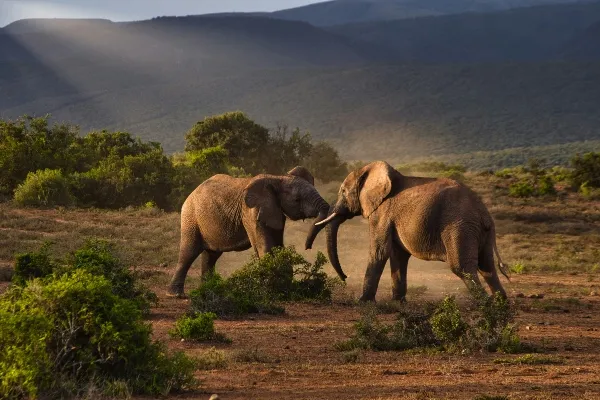
Light and composition elevate a record shot to a work of art. The South African “Golden Hour” is particularly rich, warm, and brief—be ready.
Shoot Into the Light (Backlighting): While shooting with the sun behind you is standard, the most dramatic shots are often created by intentionally shooting into the setting or rising sun. This technique creates a stunning rim-light or hair-light around the animal, making them glow against a darker background. You will need to overexpose by $+1$ to $+2$ stops to lift the shadows on the animal.
Eye-Level Intimacy: Always strive to get your camera down to the animal’s eye level. This creates a much more intimate, powerful connection with the viewer. Use your beanbag on the lowest point of the vehicle’s door or floor.
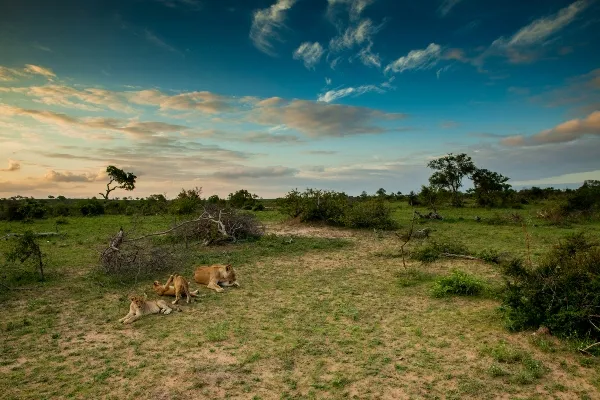
The Power of Negative Space: Don’t zoom in for every shot. For a small subject like a leopard, try placing it deliberately in a corner of the frame with a vast, empty stretch of the African savannah as the negative space. This tells a story of loneliness, vulnerability, or the sheer scale of the wilderness.
Include the ‘Frame’: Look for natural elements to frame your subject, such as the curved branch of an Acacia tree, the tall yellow grass of the winter bush, or a line of low-lying boulders. This adds depth and draws the viewer’s eye.
Frequently Asked Questions
What camera settings should I use for photographing moving wildlife on safari?
To capture moving wildlife effectively, set your camera to a minimum shutter speed of 1/1000 second. Adjust your ISO according to the light conditions to maintain exposure, such as using ISO 100-400 on bright days or ISO 800-1600 during dusk.
How can I enhance my wildlife photos using natural light?
Utilize the golden hour, which occurs just after sunrise and before sunset, to achieve the best lighting for your wildlife photos. Position your subject with the sun behind you to ensure even illumination, reduced harsh shadows, and vibrant colors.
What composition techniques can I apply for impactful wildlife photography?
Use the rule of thirds to position your subject, and include environmental context to create depth in your images. Consider getting down to the animal’s eye level for a more intimate perspective that connects viewers emotionally with your subjects.
How can I stay safe while photographing wildlife during a safari?
Maintain a minimum distance of 75 feet (23 meters) from wildlife to ensure both your safety and that of the animals. Remain calm, move quietly, and follow your guide’s instructions to avoid disturbing the natural behaviors of wildlife.
What gear protection measures should I take while on a safari?
Protect your photographic gear by using weatherproof camera bags and packing silica gel packets to absorb moisture. Additionally, carry lens hoods and rain covers to shield your equipment from dust, sand, and sudden weather changes.
How can I capture action moments effectively during a safari?
To capture dynamic moments, use Continuous High shooting mode to take multiple frames per second. Anticipate wildlife behavior by observing animal body language, allowing you to be ready when those split-second action shots occur.